Keep Exploring!
When you make a purchase from Seed Savers Exchange, you help fulfill our nonprofit mission to protect our food and garden heritage. Do even more good by making a donation to help us preserve and share even more heirloom varieties!

Dependable and easy to grow, beans produce rewarding crops in gardens across the country. These growing instructions are for common beans (Phaseolus vulgaris). There are many other species of beans, including runner beans, lima beans, cowpeas, and soybeans.
Beans are classified based on how long they stay on the plant before they are harvested for food consumption: Snap, Shell, or Dry. They can also be classified by growing habit: Pole or Bush.
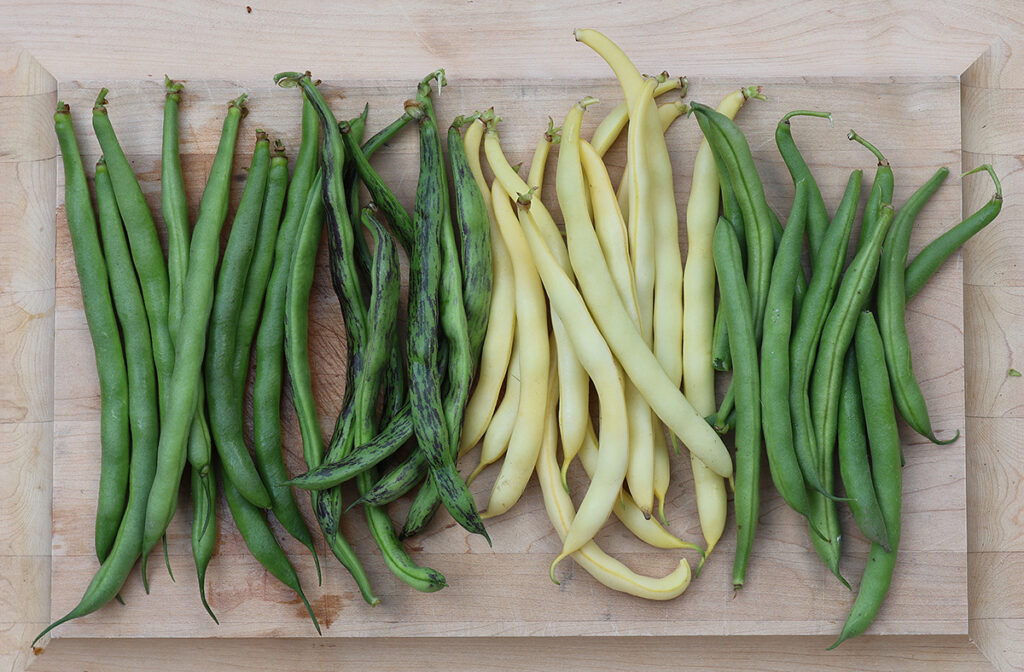
Snap beans, also known as green beans or string beans, are harvested early when the pods are juicy, firm, and easily snapped in half. The seeds inside the pods should be very young and barely visible. Snap beans usually reach this stage after 50-60 days of growth, though this can differ depending on the variety. Snap beans are typically eaten fresh, steamed, or sautéd. Purple podded beans, such as ‘Royalty Purple Pod,’ wax beans, such as ‘Pencil Pod Golden Wax,’ and French beans, such as ‘Fin de Bagnol,’ are also types of snap beans.
Some of our favorite snap bean varieties include:
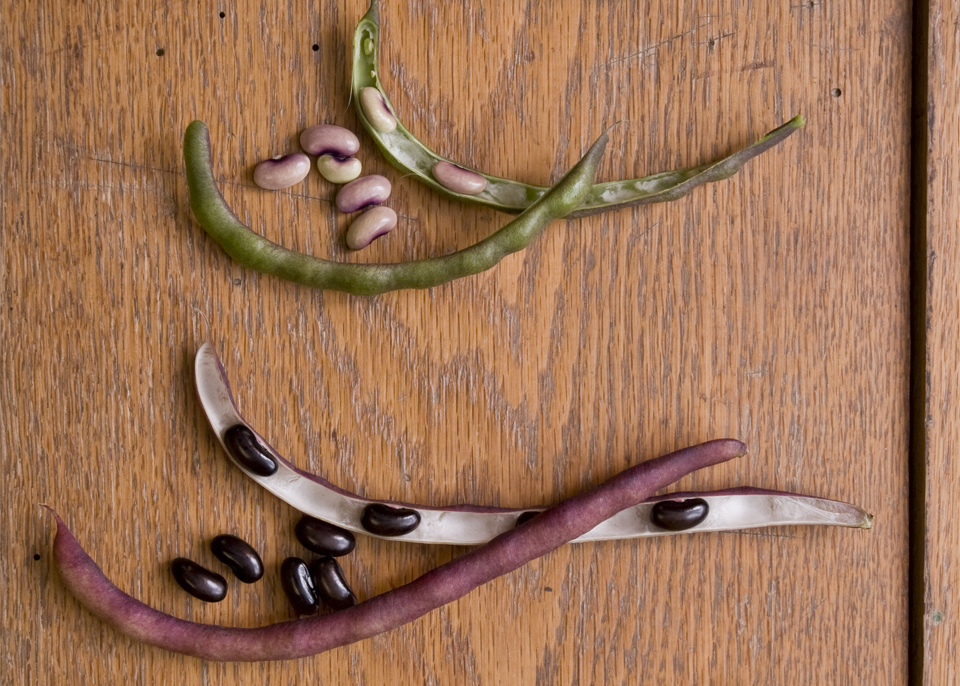
Shelling beans are harvested later than snap beans, when the pods are plump and have started to dry and lose their color, but are still soft and pliable. The seeds should be developed and plump, but still soft. Shelling beans are removed from their pods and then boiled, simmered, or sautéd—no need to soak!
Most bean can be eaten in their shelling stage. One of our favorite beans for shelling is ‘Tiger’s Eye.’
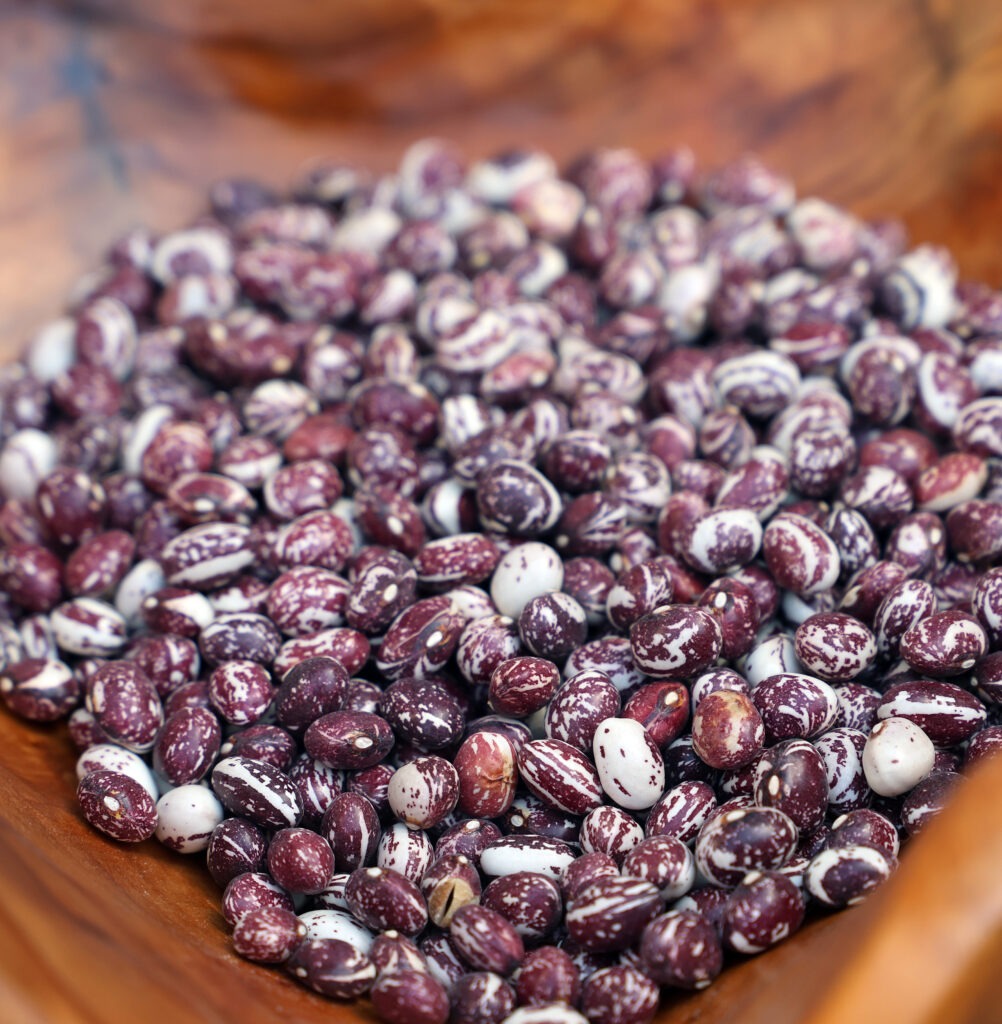
Dry beans are harvested at full seed maturity—when pods are dry, brown, brittle, and appear “shrink wrapped” around the seeds. Dry bean seeds should be too hard to dent with a fingernail. Dry beans can store for years if properly dried, but need to be soaked before eating. After soaking, beans are boiled or simmered and can be added to a wide variety of dishes.
Some of our favorite dry beans include:

Some bean varieties can be eaten in the snap or dry stage. Our favorites include:
Beans are also classified by their growing habit: Pole or Bush.
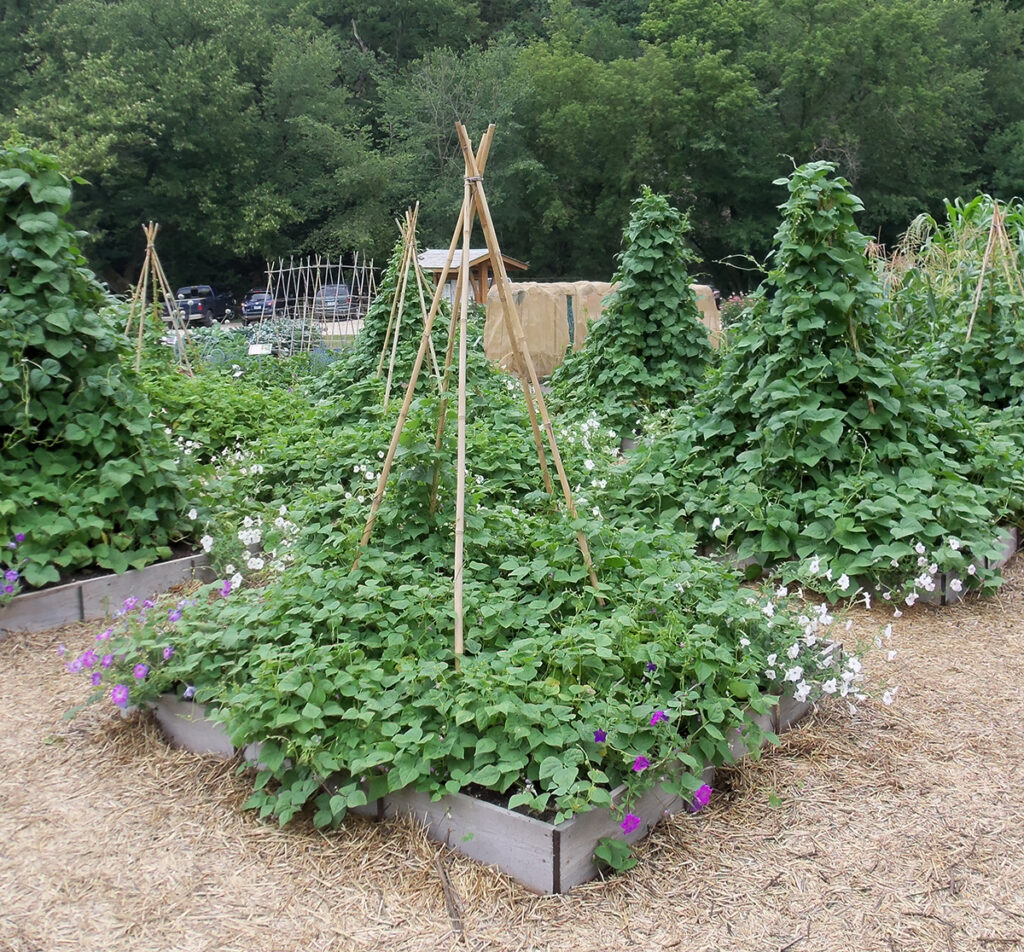
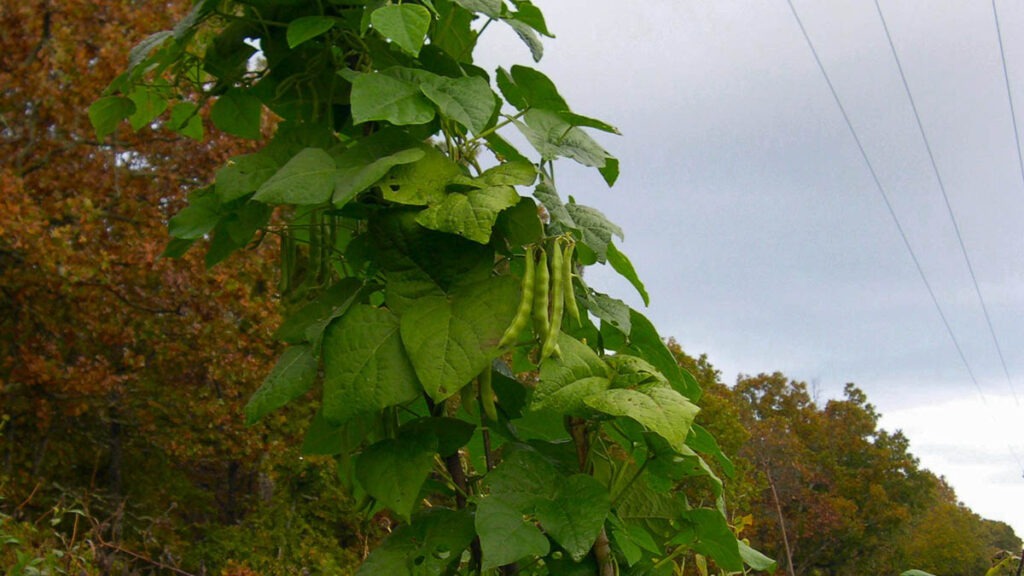
Pole beans have a climbing habit and require a trellis for support. Pole bean vines can climb anywhere from 5 to 10+ feet tall, depending on the variety. Pole beans are largely indeterminate, with fruits ripening throughout the growing season.
Some of our favorite pole bean varieties include:
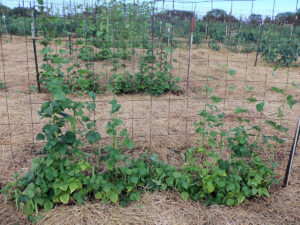
Bush beans do not have a climbing habit, instead reaching only 2-3 feet tall. Bush beans can support themselves and do not require a trellis. They may be compact or sprawling, depending on the variety. Many bush beans are determinate, with fruit ripening relatively at the same time.
Some of our favorite bush beans include:
Beans grow best in full sun, planted in well-drained and warm soil. Beans are fast growing and are most commonly sown directly into the soil.
When to Start Outdoors
Direct sow after the soil has reached at least 50 degrees F, but preferably when the soil is 60-80 degrees F.
When to Start Indoors
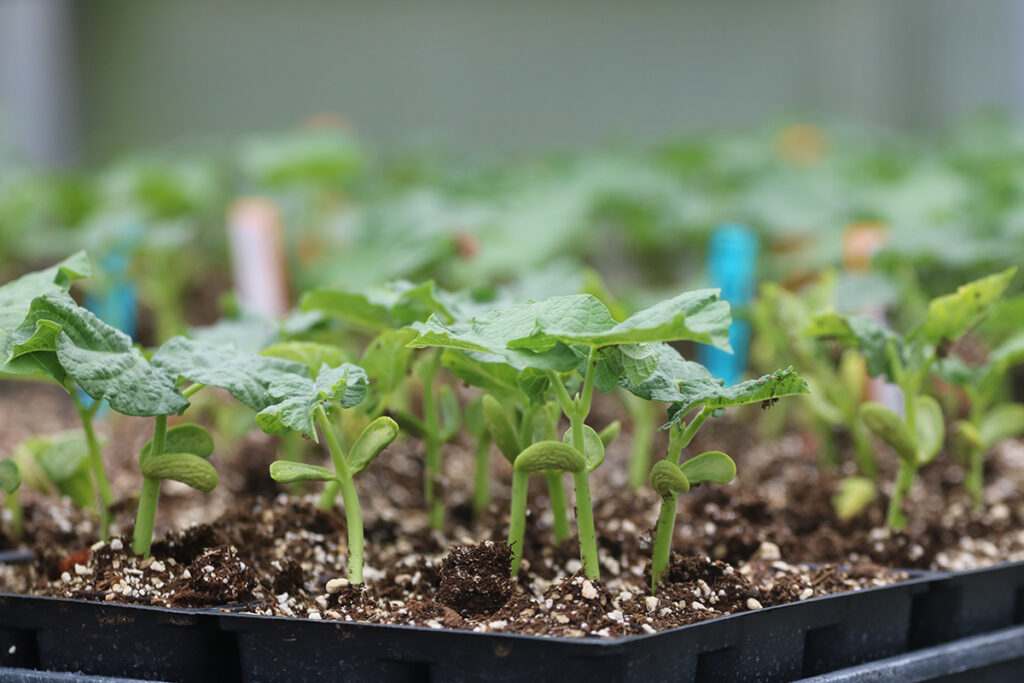
While not recommended, starting bean seeds indoors is also possible. Beans do not like having their roots disturbed and are prone to transplant shock. If you choose to start beans indoors, consider these tips:
Beans are a hard-seeded crop. This means that the seeds form hard seed coats that are impermeable to moisture. This contributes to the seeds’ longevity in storage, but can inhibit their germination.
Hard-seed germination often occurs late and erratically. While it is inconvenient for gardeners, hard-seededness is an effective plant-survival mechanism; seeds that germinate later may take the place of those that germinated earlier but didn’t survive.
While bean seeds will still grow with no intervention, there are several ways to prepare the seeds to encourage germination:
1. Soaking
Soaking bean seeds helps to break down their hard coat. Soak beans in lukewarm water for 4-12 hours. Larger seeds benefit from a longer soaking time than smaller seeds. Plant seeds immediately after soaking.
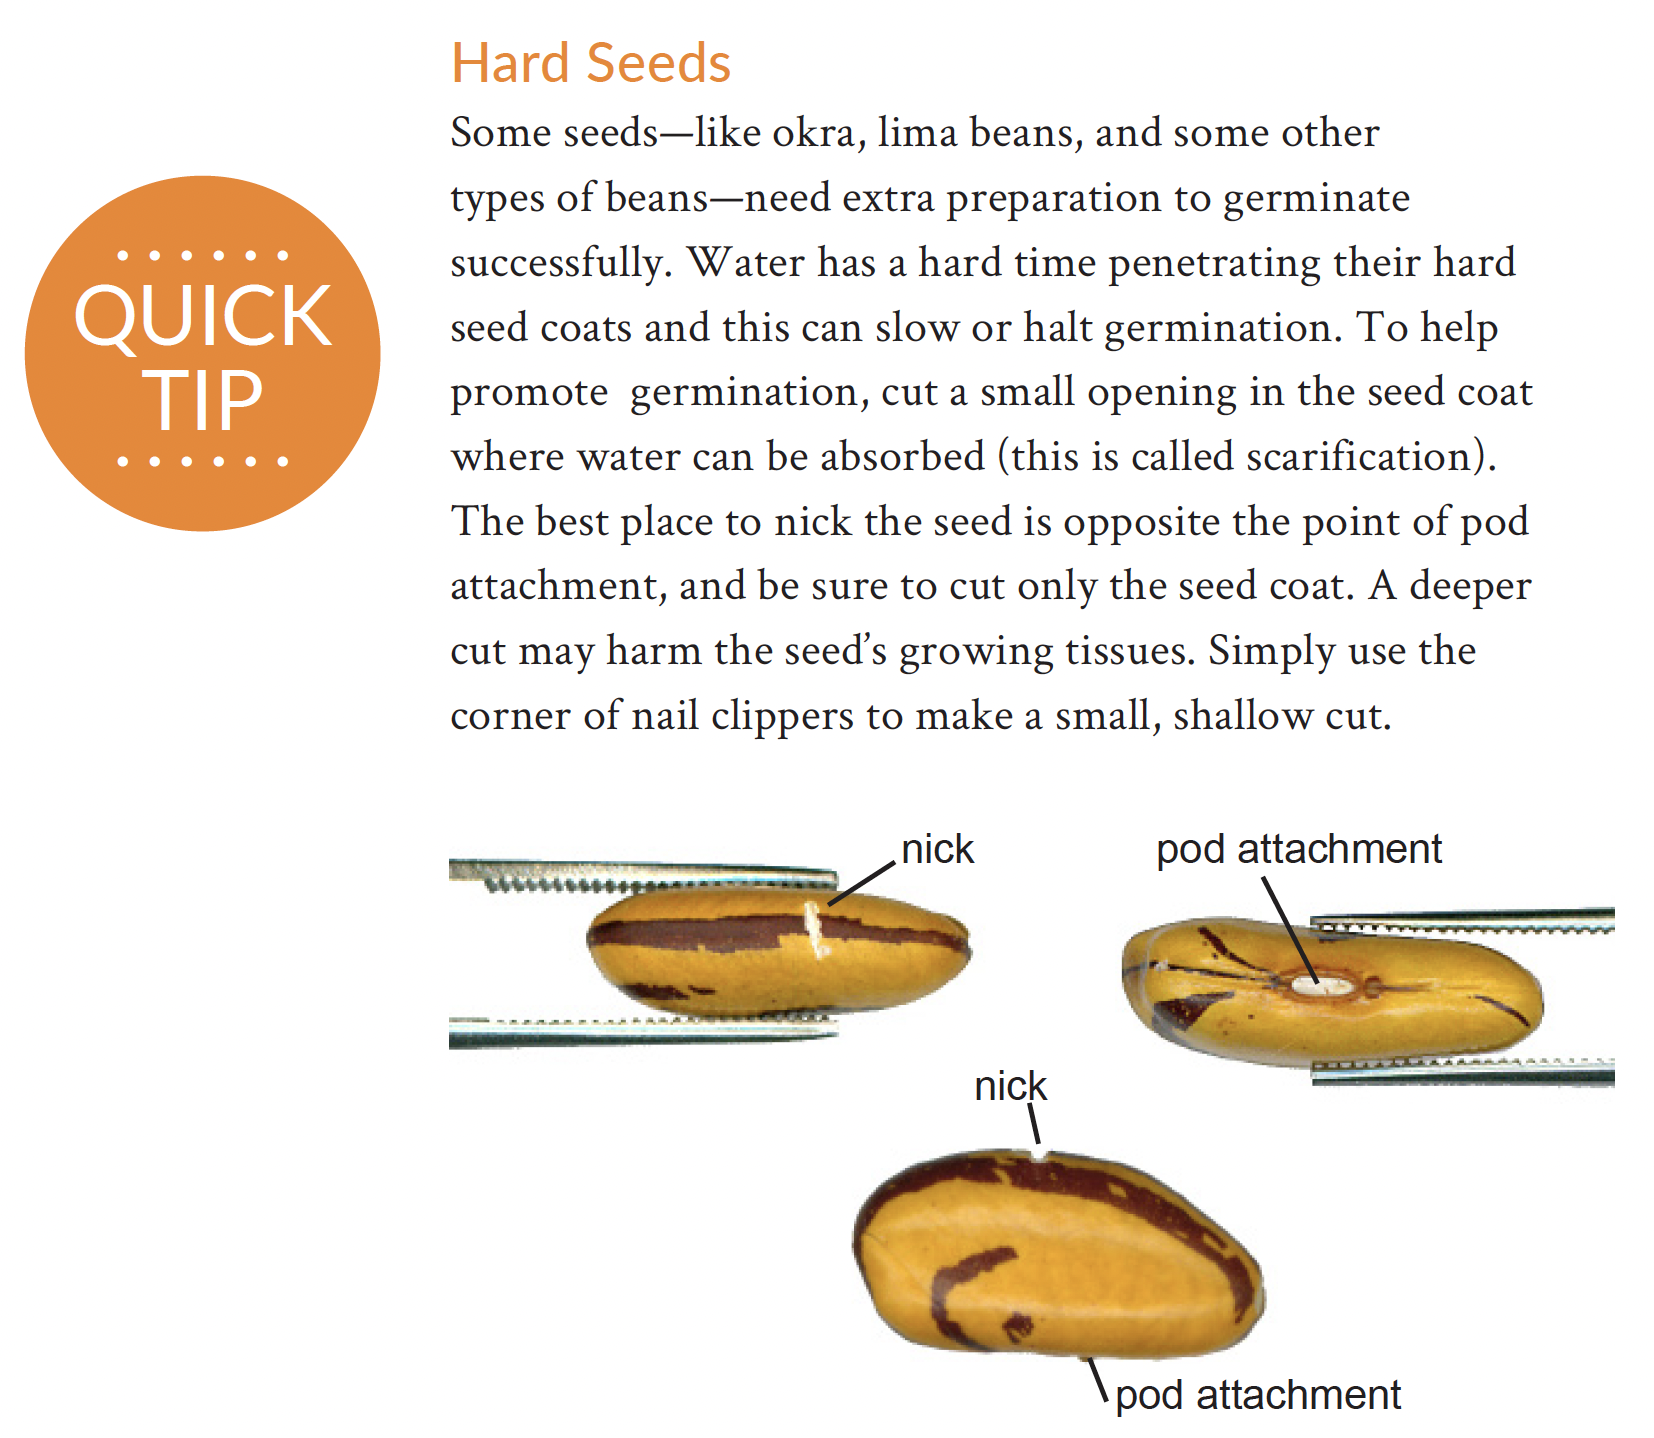
2. Scarification
Nicking the seed coat (or scarification) can increase germination in hard-seeded crop types. Scarification creates a small opening in the seed coat where water can be absorbed. This can be done at home with a pair of nail clippers, a razor blade, or sandpaper.
How to Scarify Seeds
Plant bean seeds about 1″ deep, or approximately double the width of the seed. Different bean varieties can vary widely and larger seeds should be planted deeper than small seeds.
Roots will develop from the hilum (or “bellybutton”) of the seed. Plant seeds with the hilum facing down to give the roots a direct path into the soil.
Water the seeds in after sowing.
Plant bean seeds about 2-3″ apart. Space rows 12-36″ apart. Garden spacing is the same whether growing for seed or to eat.
8-10 days
Beans require full sun (6-8 hours of direct sunlight). In very climates where summer temperatures regularly exceed 85 degrees F, beans can benefit from a little afternoon shade during the hottest months to keep cool, provided the direct sunlight requirements are met.
Beans have shallow roots and need frequent, shallow watering, about 1 inch of water per week, sometimes more during dry spells or during the flowering period of growth. Beans need loose, well-draining soil. Excess watering can lead to root rot.
To keep bean plants healthy and prevent disease, use drip irrigation or water at the base of the plant. Avoid getting the leaves and pods wet if possible.
Pole beans have a climbing habit and must be trellised to provide support. Trellises can be built out of bamboo, twine, hog panels, and other materials. Learn how to build several types of trellises.
Plants such as sunflowers, corn, okra, or even cosmos (C. bipinnatus) and other tall, sturdy flowers, can also be used as living trellises for pole beans.
Bush beans do not require trellising. If you find that your bush bean plants need support, or start collapsing under the weight of fruit, you can tie the main stems to short stakes.
Weed regularly to ensure the plants have room and resources to grow without the competition of weeds.
Hand hoes, collinear hoes, and small scuffle hoes are handy for precision weeding. Be sure to scratch every square inch of soil, even if you don’t see a weed, in order to catch any germinating “thread stage” weeds.

Mulch can also help suppress weeds, improve drainage, conserve water, and help regulate soil temperature.
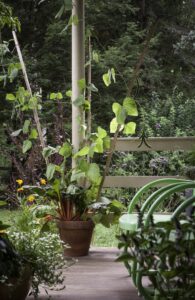
Beans can also successfully grow in containers. Beans don’t form deep roots and can even be grown in relatively shallow containers, though grow bags and 5-gallon buckets also work well. Containers should be opaque and well-draining. Be sure to drill drainage holes if your container doesn’t already have them.
Learn more about container gardening.
Common beans can be affected by a number of diseases. Some of these diseases can remain in the soil for several years, so grow your beans in different areas of the garden each year.
To prevent the spread of fungal and bacterial diseases among plants, avoid working in your bean patch when the foliage is wet. The best way to get rid of beetles and bugs that might eat the leaves of your plants is to pick them off and toss them into a jar of soapy water.
To harvest beans, hold the vine/plant with one hand and pull the bean pod in an upward motion with the other hand. Take care not to damage the plant, so it will continue producing more pods.
Harvest pole beans when they start producing pods until the first frost. Some gardeners extend their season by covering their plants with sheets, blankets, or row cover ahead of cold weather. Bush beans have a shorter harvest window at 2-3 weeks.
Beans can be harvested in the snap/green stage, the shelling stage, or the dry stage. Snap or green beans are ready for harvest when the pods are still tender before the seeds start to swell. Shelling beans are ready for harvest after the pod has changed color and the beans have plumped, but before the pods and seeds have dried. Dry beans are ready for harvest when the pods are dry and brittle, and the seeds inside are hard.

Green (snap) beans are best eaten fresh, canned, or frozen. Shelling beans are best eaten fresh and must be removed from their shells before being eaten. Dry beans must be soaked and boiled before eating.
Try this Panzanella Green Bean Salad by Beth Dooley, chef and author, or Great Grandma’s Sour Dill Yellow Beans by Liz Belina, Seed Savers Exchange member.
Dry beans can be stored for months or even years. Beans prefer a dark and airtight space. Green beans last in the refrigerator for about a week. Store them in a bag or container in the crisper drawer of the refrigerator.
Common beans are one of the most popular garden crops from which to save seeds, because the task is so straightforward.
Saving seeds from a dry bean planting is as simple as setting aside and properly storing a portion of the harvested seeds, provided the variety was properly isolated. Green beans and shelling beans, on the other hand, must be grown past market maturity in order to produce viable seeds.
Beans are annual crops. Annual crops complete their full life cycle—including germination, reproduction, and death—in one growing season.
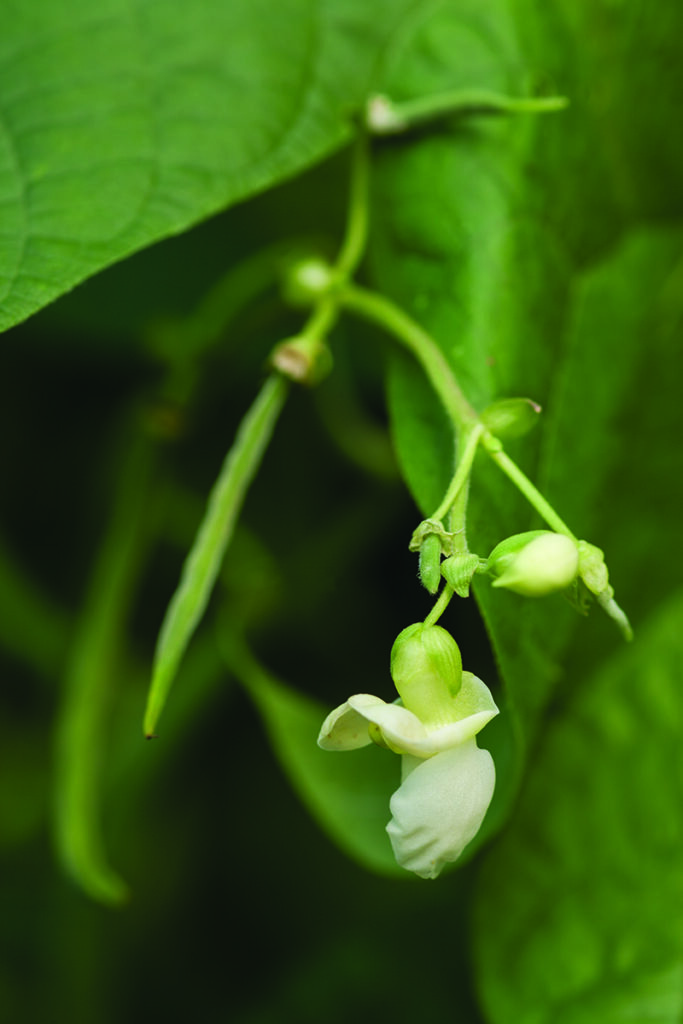
Peppers have perfect flowers. This means that each flower contain both pollen-producing (male) and pollen-receiving (female) parts, and is therefore self-pollinating.
When saving bean seeds, separate varieties by 10-20 feet.
Insect pollination is still possible and can occur with some frequency, depending on the variety and climate. If genetic preservation is the goal, increase the isolation distance to 100 feet.
Inbreeding is not an issue with common beans. To ensure viable seeds, save seeds from at least 1 plant. When maintaining a variety over many generations, save seeds from 5-10 plants. If you’re saving seeds for genetic preservation of a rare variety, save seeds from 20 plants.
Only save seeds from healthy plants. Beans can be harvested for seed anytime after the seed pods have begun to fade in color, though it’s encouraged to let the pods dry as much as possible on the plant until the pods are brittle and appear somewhat “shrink wrapped” around the seeds within.
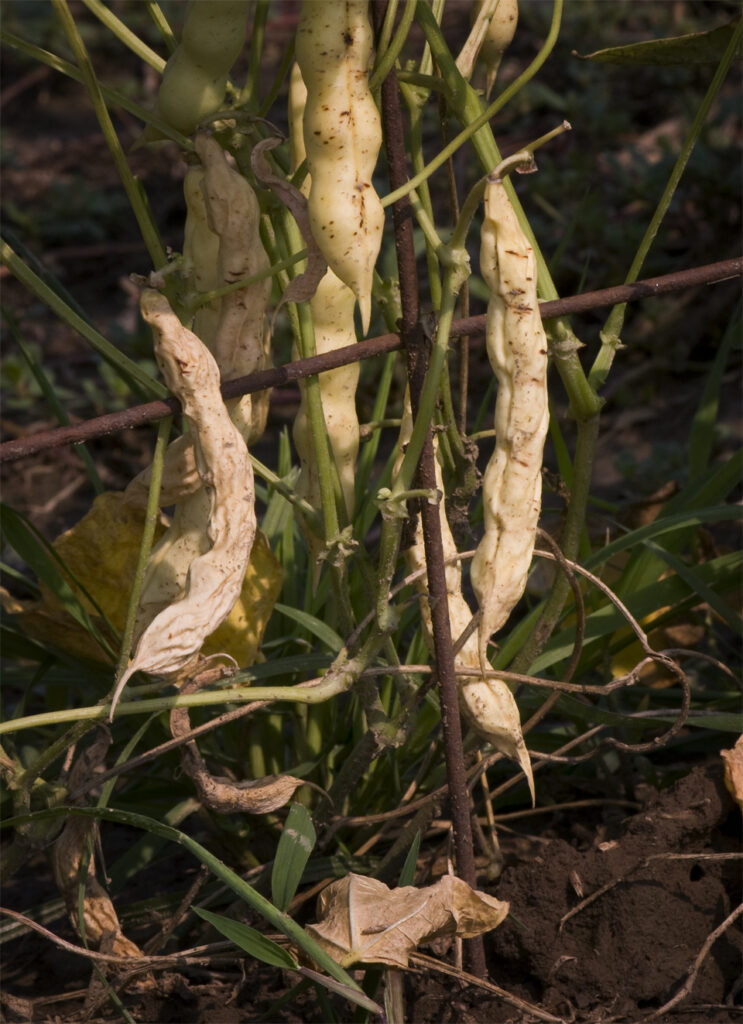
The fruits of bean plants split open at maturity, but the pods of most varieties of common beans can be left on the plant to dry fully without fear of losing seeds to shattering.
Harvest bean seeds on a dry, sunny day. Bean pods can be handpicked, or whole plants can be cut at the base.
Most gardeners collect fruits from pole beans by hand as they mature, and even if entire bush bean plants are to be harvested only for seeds, handpicking pods is common on the home garden scale.
If harvested prior to the pods turning tan and papery, the pods should be allowed to dry on screens or landscape fabric in a protected place until the seeds become too hard to dent with a fingernail.
If bean pods are not completely dry before the first frost, pull the plants up and dry them further indoors.
Hand-Shelling: Best for Home Gardeners and Small Quantities of Bean Seeds
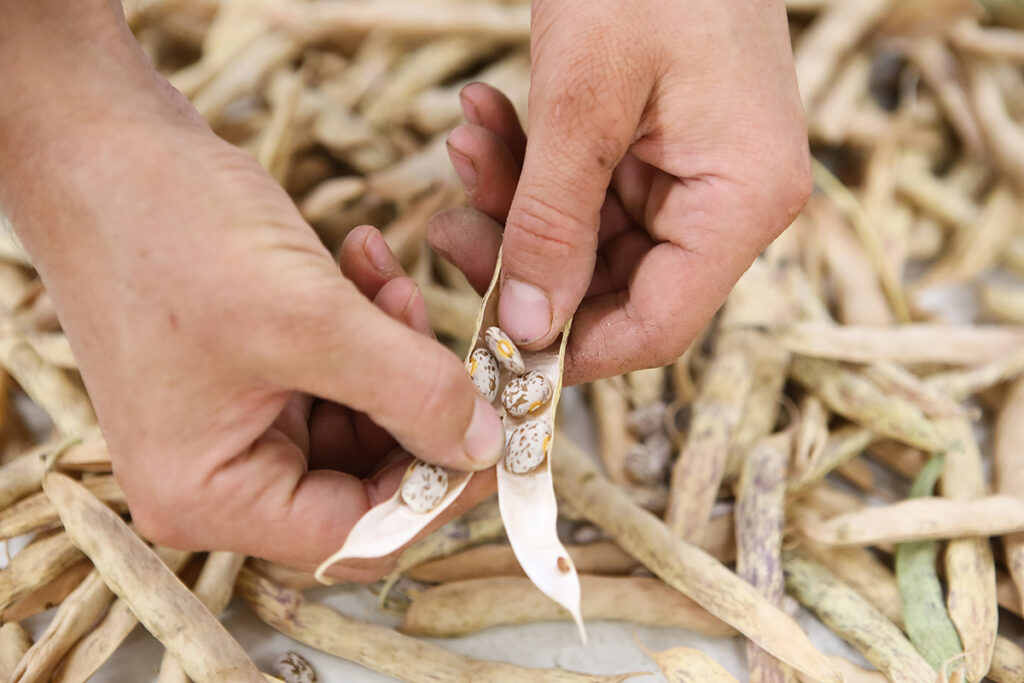
Dry pods can be hand-shelled, which is the easiest method for home gardeners, especially if saving a small quantity of seed. When the bean pods are completely dry, break them open to release the seeds. Separate the seeds from the chaff, or extra plant material.
Threshing, Screening, and Winnowing: Best for Large Quantities of Bean Seeds
If saving a large quantity of bean seeds, you can thresh the pods and then screen or winnow the seeds.
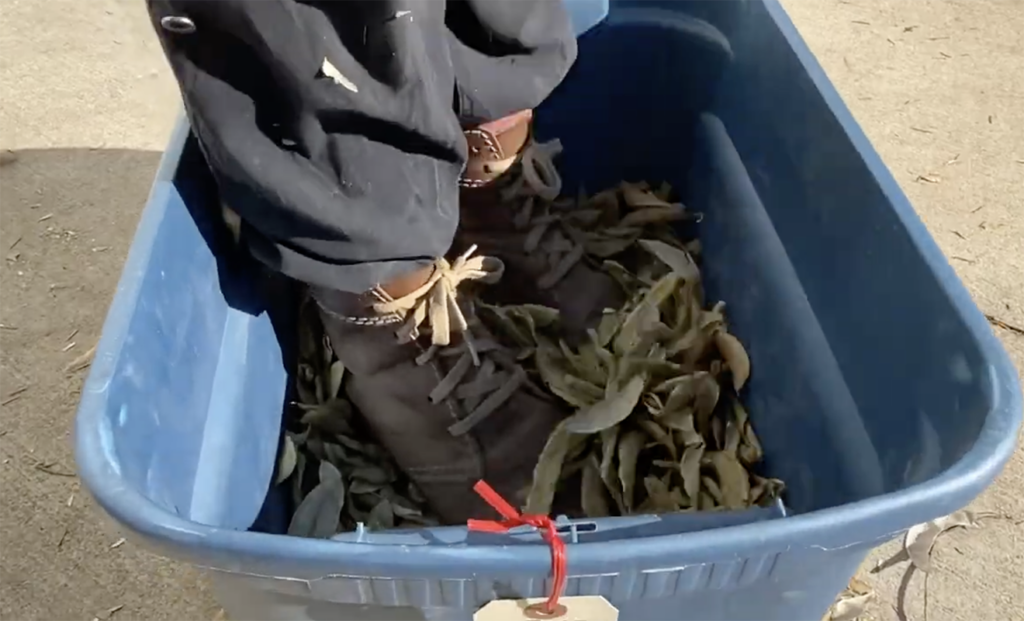
Threshing involves applying friction to separate seeds from the pods, or chaff. To do this, place the harvested material into a sack, on a tarp, or into a container and tread lightly on it. Make sure to wear shoes with thick soles that evenly distribute your weight. Only tread on the seeds if there is a sufficient amount of plant material to buffer the force exerted on the seeds.
Next, you can gently rub the threshed materials against a screen, hardware cloth, colander, or similar tool to separate the seeds from the chaff. Make sure to select a screen with holes large enough for the seeds to fit through. For beans this is typically a 11/64–34/64 inch (4.5–13.5 mm) screen.
Alternatively, you can winnow the threshed materials. This process involves using air currents or wind to separate seeds from chaff.
Watch this video tutorial to learn how to thresh and winnow legume seeds.
Make sure bean seeds have completely dried until they are too hard to dent with a fingernail. Store bean seeds in a cool, dark, and dry place and always keep them in an airtight container to keep out moisture and humidity. Under these conditions, you can expect your bean seeds to live 3-4 years.
Read more about storing seeds.
If you’re interested in getting started with seed saving in your garden, legume crops such as beans, soybeans, and peas make it easy. In this webinar, we discuss all the necessary details, from how your legumes are pollinated to threshing and winnowing after harvest.
Keep Exploring!
When you make a purchase from Seed Savers Exchange, you help fulfill our nonprofit mission to protect our food and garden heritage. Do even more good by making a donation to help us preserve and share even more heirloom varieties!