Related
Corn Hand-Pollination

How to Hand-Pollinate Corn
All corn, Zea mays, varieties are wind-pollinated and will readily cross with each other. Because corn pollen can travel a quarter mile or more on the wind, and because corn is grown in nearly every region of the United States, isolation by distance is unreliable when trying to save true-to-type seed from a corn variety.
In absence of isolation, hand-pollination ensures that the corn plant’s flowers are not contaminated by pollen from another variety. Hand-pollination prevents hybridization and ensures that the plant produces seeds that are true-to-type.
Corn is a monoecious plant. This means that one corn plant has both male and female flowers. The male flower is the tassel, which forms at the top of the stock. The tassel produces anthers that shed pollen.
The female flowers are the ears that grow out of the stalk of the plant in shoots. The silks, which grow out of the ears, are the stigmas of the female flower and are receptive to pollen along their entire length. Each silk attaches to an ovary that will become a single kernel on the cob if fertilized.
Corn plants are ready to be pollinated when the tassels are fully expanded and the anthers begin shedding pollen. But some preparation for han-pollination is necessary to prevent contamination before plants reach this stage.
Overview
- Bag shoots when tassels become visible, before silks emerge.
- Bag tassels when anthers are shedding pollen, the day before hand-pollination.
- Collect and prepare pollen.
- Pollinate each shoot.
- Re-cover each shoot.
Materials
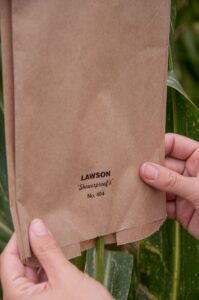
- Corn shoot bags
- Tassel bags
- Paperclips or stapler and staples
- Fine mesh kitchen strainers or sieves
- Garden shears or scissors

Use shoot and tassel bags specifically for the corn hand-pollination process. These bags shed water and are important to weatherproof the pollinating tassels and silks. Corn shoot and tassel bags are available for purchase on our website.
When to Bag Shoots
Start covering developing ear shoots when tassels start showing above the uppermost leaves of the plants’ stalks. Cover shoots before silks emerge. Once you can see silks, they may already have foreign pollen contamination. Bag shoots during the day after morning dew has dried.
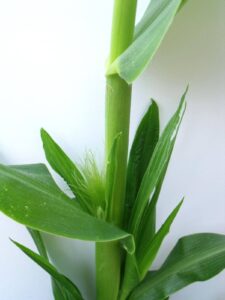
Identifying Shoots
Ear shoots develop on the lower part of a corn stalk, in the axil between the main stem and a leaf. To find shoots, look for husk leaves along the stem. The husk leaves of the shoot will appear from the leaf nodes along the stalk, typically beginning at the bottom of the plant.
If any silks have emerged from the shoot, do not bag it. Stray pollen could have contaminated any exposed silks.
Bagging Shoots
Some manipulation of the plant is necessary to cover the shoot. Some varieties have sizable husk leaves attached to the main stalk that surround the shoot.
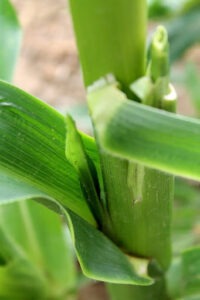
Cut the husk leaves back so they do not push the bag off the ear as the ear continues to grow. In some cases, this leaf may be obscuring the shoot. To remove, grab the leaf and tear it at the point where it joins the stalk, in one smooth, quick, downward motion.
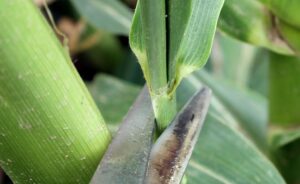
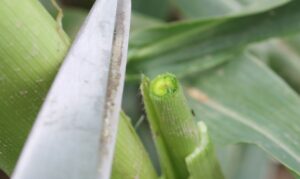
If a shoot is longer than 1 inch, trim the top with a pair of garden shears. This will help prevent the shoot from growing too quickly and pushing the bag off. Be careful to only cut through the sheath of leaves and not into the cob.
This cut may sever some non-emerged silks, which will be visible as a pea-sized circle in the center of the shoot. Again, if the silks were visible before this cut, do not bag the shoot.
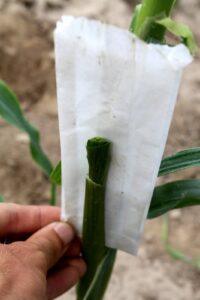
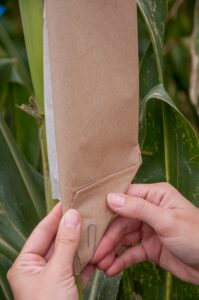
Next, use a knife or the closed end of the shoot bag to create a small vertical slit between the shoot and the stalk. This will make room for the shoot bag to be securely wedged into place. Perform this step with care without cutting the ear from the plant.
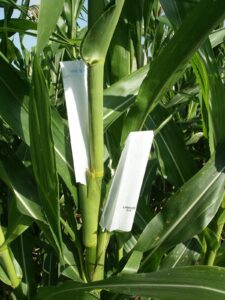
Last, place the shoot bag over the immature ear. Wedge the long side of the bag into the slit in the collar so that wind will not blow it off. A properly bagged ear is well protected against drifting pollen.
Ears can remain covered until they are hand pollinated. Monitor the bags to ensure that they remain in place.
Cutting Back Silks:
Check shoot bags daily to see if silks have emerged by lifting the shoot bag off the shoots. Sometimes, silks can become visible through the shoot bag, especially if the variety has pigmented silks.
Once silks emerge, trim them flush with the shoot tip using a pair of garden shears or scissors. Do this without cutting too deeply and damaging the developing cob tip. Remember to sanitize the scissors between varieties to avoid contamination from other pollen.
This will slow the growth and elongation of the shoot leaves and silks so that the growing shoot doesn’t puncture the shoot bag or push the bag off. Trimming also prevents the silks from growing too long and emerging from beneath the shoot bag, where they could be contaminated by stray pollen. Freshly cut silk tips are not receptive to pollen when wet, but are still receptive along their exposed lengths. Replace the bag over the shoot until pollination.
Silks can be receptive for up to 10 days after emergence, but the most successful fertilizations occur in the first 4-5 days.
When to bag tassels:
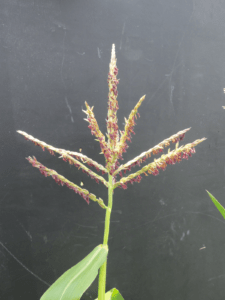
If the tassels are bagged while they are still green, they will stop developing and never shed pollen. As the tassel matures, its lateral branches begin to droop away from the main stalk and become horizontal.
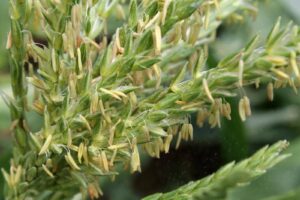
Once the tassel’s anthers (usually red or yellow and smaller than a grain of rice) start to emerge along the tips of the lateral branches and the main branch of the tassel, the tassel is ready for bagging. The anthers shed pollen over the course of about a week.
Place tassel bags over actively shedding tassels in the afternoon the day prior to pollination. Weather and time of day have a strong bearing on when tassels will shed pollen. High humidity can cause anthers to remain closed.
Anthers generally begin to shed pollen in the morning after the dew has evaporated and any morning chill is gone. Pollen shedding decreases as temperatures top 86°F. Anthers may close up during the hottest part of the day then reopen in the afternoon or evening.
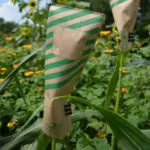
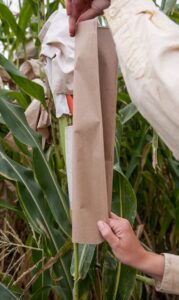
Bagging Tassels
To begin, brush off any old anthers by running your hand upward over the tassel. Hold all the branches of the tassel in one hand and slip the entire tassel inside a tassel bag.
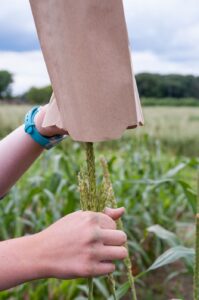
Flatten and straighten the bag upright as well as possible without breaking the tassel. Then fold a light crease in the bag lengthwise to prevent it from collapsing.
Pinch the stalk between the flat edges of the bag. Fold the bottom corner of the bag upwards at a 45-degree angle as close to the stalk as possible. Use staples or a paper clip to secure the bag around the stalk to prevent the powdery pollen from falling out.
When bagging the tassels of taller varieties, be careful not to break the stalk when bending the stalk to reach the tassel. Use a ladder if necessary.
Trimming Shoots
Remove the shoot bags and trim the husk tips on each shoot on the same afternoon as bagging the tassels. Trim the husk tips on each shoot to expose a pencil-wide area of silks in the center.
Be careful not to cut too low or damage the shoot. Some varieties have tight husk tips and will require cutting back a little further past the pinched part of the husk leaves. The silks will grow overnight to form a thick brush that will be all one length and easier to pollinate.
Do this step quickly to limit the exposure of developing silks to airborne pollen. Replace each shoot bag immediately after trimming.
Collecting Pollen
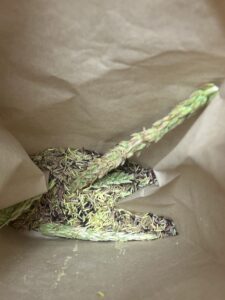
The next morning, after any dew has evaporated and the tassel bags are completely dry, gather the corn pollen. Gently bend the bagged tassel over until the opening of the bag is higher than the sealed end.
Shake, tap, or whack the bag lightly several times to dislodge any remaining pollen from the anthers. Keeping the bag tilted so the pollen cannot fall out, slip the bag off the tassel. Work carefully to avoid breaking the tassel, which you may be use for pollen again as more anthers open.
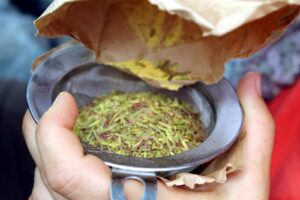
After collecting all tassel bags, combine the pollen into a single bag. Using a fine mesh strainer or sieve, sift the pollen into another tassel bag. Shake the pollen mixture and then pour into an unused white shoot bag. Mixing the pollen will help to ensure genetic variability within the plants.
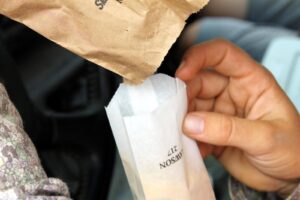
Hold on to the tassel bags used for pollen collection. You will re-use these to cover the pollinated shoots.
Sources differ regarding pollen longevity. Sources state that pollen can remain viable anywhere from 20 minutes to 24 hours. Work as quickly as possible to ensure the viability of the pollen.
Pollen viability significantly drops at temperatures above 100°F, so pollinate early to avoid high daytime temperatures. Pollen becomes darker yellow and clumpy as it loses viability.
Hand-Pollinating
Stand upwind of the shoot to shield the silks from wind and stray pollen. Only remove the shoot bag and pollinate the silks from one ear at a time. If the silks are exceptionally long (more than 2 inches), use the shoot bag to tear some of their lengths. Avoid touching the silks with bare hands.
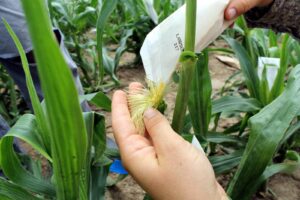
To hand-pollinate an ear of corn, sprinkle the bulked pollen uniformly over the silks. Since being trimmed the day before, the shoot should have formed a short, even flush of silks that can easily be dusted with a small amount (about 1⁄16 teaspoon) of pollen. Work quickly to limit the silks’ exposure to wind-borne pollen.
It only takes one viable pollen grain per exposed silk to fertilize a kernel, so very little pollen is needed to create a successful pollination. With that said, there is no harm in using more pollen if it is available.
Using extra pollen can help ensure fertilization if the viability of the pollen is questionable (i.e. clumpy). This also helps reduce the likelihood of accidental outcrossing by saturating the silks and reducing the surface area available for stray pollen grains to take hold.
Finally, using extra pollen increases the odds that each silk will be fertilized by the applied pollen, even in the presence of a few stray pollen grains.
Covering the Ears
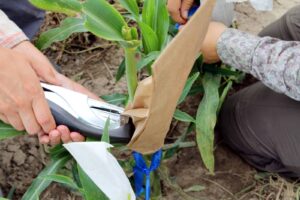
After pollinating an ear, immediately cover the shoot with a brown tassel bag. Secure the bag in place by wrapping the edges of the bag around the stem and stapling the two sides together. The bag should fit snugly over the ear to stay in place. However, it should also be loose enough to allow the ear to grow and expand comfortably.
Silks are receptive to pollen for up to 10 days. Remove the bags after this period and once the silks have dried and the kernels have started developing. Removing the tassel bags from the shoots will give the ears proper air circulation and help deter fungal infection.
Precautions
Corn leaves can be scratchy with sharp edges. Take care to avoid cuts, especially around the face and neck.
Pollen will stick to your clothes and remain lodged under your fingernails. Brush off your clothes and sanitize your hands and tools thoroughly between varieties.
When collecting pollen, use one strainer per variety per day. When cleaning strainers after pollination, rinse off any visible pollen with hot tap water. Then, spray down with 70% alcohol to kill any remaining pollen before reuse. Keep clean strainers in a closed container until ready to use in order to avoid contamination from stray pollen.
If unsure whether silks have been exposed before trimming, always err on the side of caution and sacrifice the shoot to limit the chance of outcrossing.
Pests
Take preventative measures to protect the corn from pests. Crows and raccoons can quickly destroy an entire season of hand pollination. Have fencing to deter raccoons in place before the first round of pollination.
Inspect ears often for any crow damage. This is most likely to happen at the milk stage of kernel development. Place bird scare tape across the plot and secure between two tall fiberglass poles. This works as an effective crow deterrent by flashing, reflecting sunlight, and creating a thunder-like noise with the aid of a slight breeze.