Keep Exploring
When you make a purchase from Seed Savers Exchange, you help fulfill our nonprofit mission to protect our food and garden heritage. Do even more good by making a donation to help us preserve and share even more heirloom varieties!

Written in 2018 by Sara Friedl-Putnam, SSE managing editor
With the start of each new year at Seed Savers Exchange come seed orders from gardeners across the country who are eagerly anticipating another spring of growing heirloom and open-pollinated vegetables and flowers. And 2018, I discovered, was no different.
As I pitched in with order fulfillment, I plucked packet after packet of seeds from sturdy cardboard trays, helping to fill orders from customers from Massachusetts to California and seemingly every state in between. Perhaps inevitably, I also pondered this question:
What seeds will I start indoors this year?
Not even a year ago, that was the furthest thought from my mind. When I started work in communications at Seed Savers Exchange in November, 2016, I thought indoor seed starting was the domain of master gardeners and others with a green thumb. In other words, it was not for me, someone who struggled to keep even the hardiest house plants alive.
But then the first Saturday in March rolled around, and I headed out to Heritage Farm (our Decorah headquarters) to snap a few photos of the “Start with a Seed” workshop taught by fellow SSE staffer Heidi Hackman. Immediately my interest was piqued.
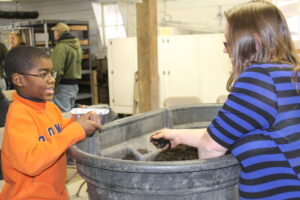
There Heidi stood beside a large tub of rich, black soil. She talked about seeds and the roles that soil, water, containers, and heat played in their germination. Perhaps most importantly, she emphasized that anyone could start seeds indoors by following a few simple steps.
Inspired, I started not only taking photos but also jotting down tips, among them:
Armed with these tips, I was determined to start plants from seeds for the very first time. What plants? Tomatoes, of course—a tried-and-true beginner’s crop. But what variety of tomatoes? That proved a tougher decision.
After the workshop, I stopped in to Seed Savers Exchange’s Lillian Goldman Visitors Center and perused the rack of tomato-seed varieties, each with its own tantalizing history.
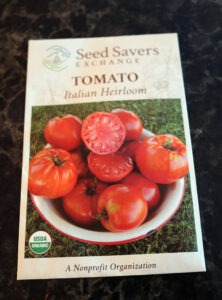
The ‘Italian Heirloom’ tomato packets immediately caught my eye. Winner of Seed Savers Exchange’s 2012 Tomato Tasting Event, the ‘Italian Heirloom’ was touted as “extremely productive,” bearing bright red fruit that grows to more than a pound and boasts excellent “full-tomato” flavor.
A productive, great-tasting, and award-winning tomato variety? I was sold!
Next up: “Adventures of a first-time seed starter, part two”: What I did right (and wrong) with those ‘Italian Heirloom’ seeds once I brought them home.
Armed with expert tips, rich soil, myriad containers, and, most importantly, a colorful packet of ‘Italian Heirloom’ tomato seeds, I was ready to embark on my seed-starting adventure.
Or was I?
After arriving home from the “Start with a Seed” workshop at Heritage Farm early last March, I scanned the back of my seed packet. “Start seeds about six weeks before average last frost date,” it read.
I wasn’t sure what the average last frost date for Decorah was so I consulted the handy online Farmer’s Almanac. I entered my zip code, and seconds later I had my answer—the average last frost date in Decorah [in 2017] was May 4, meaning mid-March was the ideal time to start those tiny seeds indoors.
But did I wait?
Despite my better judgement, I did not. I was excited, practically itching to test my green thumb. Two days later, on March 6, I tore open the packet of ‘Italian Heirloom’ seeds and followed the instructions on the packet to a tee.
I sowed the seeds ¼”-inch deep in moistened seed-starting mix I doled carefully into plastic trays I had purchased at a local garden shop. Next I set those trays on a heat mat and stretched a sheet of plastic wrap over the top of the cells to keep in the humidity, which, I had learned, would aid in germination. And then I waited for those seeds to sprout, adding water when the soil felt dry.
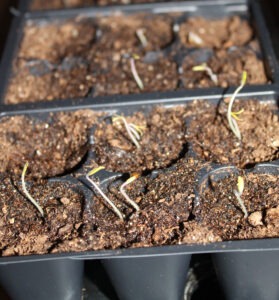
The packet promised germination in seven to 14 days, and, yes, I was definitely counting. Come the morning of day seven there were a couple little sprouts, and later in the day a few more. Cell by cell, those seedlings emerged, and cell by cell I peeled off the plastic wrap.
Then it was time to switch from bottom to top heat. I set heat lights directly over (and super-close) to my seedlings, and then I watched them continue to grow…and grow…and grow. My “babies” were sprouting, and I could not be more excited.
Yet because the packet said to place two or three seeds in each cell, I had—and, because the germination rate was close to 100 percent, I soon had more tomato seedlings in each cell than was healthy for them. (They would soon be competing with one another for nutrients.)
As hard as it was to cut out some of the seedlings I had nurtured, I pulled out my scissors and carefully thinned them out so that there was just one plant left per cell.
Those plants grew quickly, and soon I “potted up” my remaining seedlings to larger containers, being sure to keep the heat lights on them.
About this time I also “adopted” a few other tomato plants from Seed Savers Exchange that needed good homes. Without thinking, however, I mixed in the containers of my newly acquired seedlings with my home-started ones and soon had no idea which variety was which.
Not only that, but I had to keep my bountiful supply of tomato seedlings indoors longer than I should have because I started them earlier than recommended. They kept growing inside, as I waited until the temperatures outdoors warmed up enough to harden them off (or gradually introduce them to wind, direct sunlight, cool nights, and other elements).
Eventually I was able to transplant the seedlings I had started indoors into compost-enriched soil outdoors.
Thankfully, just as those plants thrived inside, they continued to grow outside. As the weeks passed, they grew up and over their cages and stakes and started producing fruits—so many fruits, in fact, I began both serving tomatoes to my family at breakfast, lunch, and dinner and giving them away to any unsuspecting visitor.
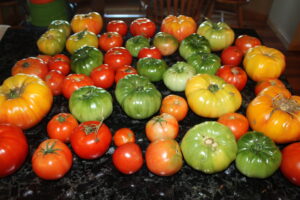
However, I never did figure out which tomatoes I was harvesting. Was I picking an ‘Italian Heirloom’? Perhaps. Or was I picking one of the other varieties I had adopted from Seed Savers Exchange? That was equally likely. Either way, they tasted great.
The bottom line? I did a lot right, and I made a few mistakes. But I learned a lot, had tons of fun, consumed many delicious and nutritious tomatoes, and ended the season looking forward to starting even more seeds this coming spring.
Part 1 originally published January 11, 2018. Part 2 originally published February 2, 2018. Consolidated and updated February 12, 2025.
Keep Exploring
When you make a purchase from Seed Savers Exchange, you help fulfill our nonprofit mission to protect our food and garden heritage. Do even more good by making a donation to help us preserve and share even more heirloom varieties!